

Welcome to Your Outdoor Oasis
Are you ready to transform your outdoor space into a lush paradise? Creating an inviting atmosphere outside your home can be a delightful project. In this article, you’ll discover five simple and effective DIY landscaping hacks that will completely revitalize your yard, regardless of your starting point.
Imagine stepping into your garden and being greeted by vibrant colors, soothing sounds, and natural beauty. These ideas will not only enhance the aesthetic appeal of your landscape but also invite relaxation and enjoyment into your daily life. From vertical gardens to charming pathways, every hack is designed to ignite your creativity while being manageable for you.
So, grab your gardening gloves and get ready to turn your outdoor area into the oasis you’ve always dreamed of. Let’s roll up our sleeves and get started!


Transform Your Outdoors: 5 Budget-Friendly DIY Landscaping Hacks Ideas with Bonus Tips!
Create a Vibrant Vertical Garden
Vertical gardens are a stunning way to utilize your wall spaces and maximize your outdoor area, especially if you’re working with limited ground space. They offer a unique visual appeal that draws the eye upwards, transforming bland walls into living masterpieces. Here’s how you can create your very own vibrant vertical garden in just a few steps.

Choose the Right Location
Start by selecting a prime wall or fence in your garden that can benefit from this lush addition. Ensure your chosen spot receives adequate sunlight throughout the day for the types of plants you wish to grow. The east-facing walls are often ideal since they catch the morning sun.
Select Your Plants
When deciding on plants for your vertical garden, consider choosing a mix of trailing, climbing, and compact plants. Some popular choices include:
Always select plants that complement each other in terms of water and sunlight needs.
Utilize Creative Structures
Next, think outside the box to create a structure that supports your vertical garden. You can repurpose old pallets or wooden trellises, or even install pocket planters. Some ideas include:
Involving your children or friends in the construction can make this project even more fulfilling and fun!
These durable ties are perfect for securing climbing plants or keeping cascading vines gracefully aligned along the structure.
Care and Maintenance
Once your vertical garden is in place, be sure to implement a watering routine and monitor plant health. Vertical gardens can dry out faster than ground gardens, so check moisture levels regularly. You may also consider setting up a drip irrigation system to ease the watering process.
Creating a vertical garden not only adds beauty but also optimizes your space effectively. You’ll soon find that your outdoor area feels more alive and inviting.
As you step back to admire your handiwork, consider how to connect your vertical garden with other elements in your landscape. Up next, let’s explore how to embrace natural pathways using mulch and stone that will further enhance your outdoor oasis!
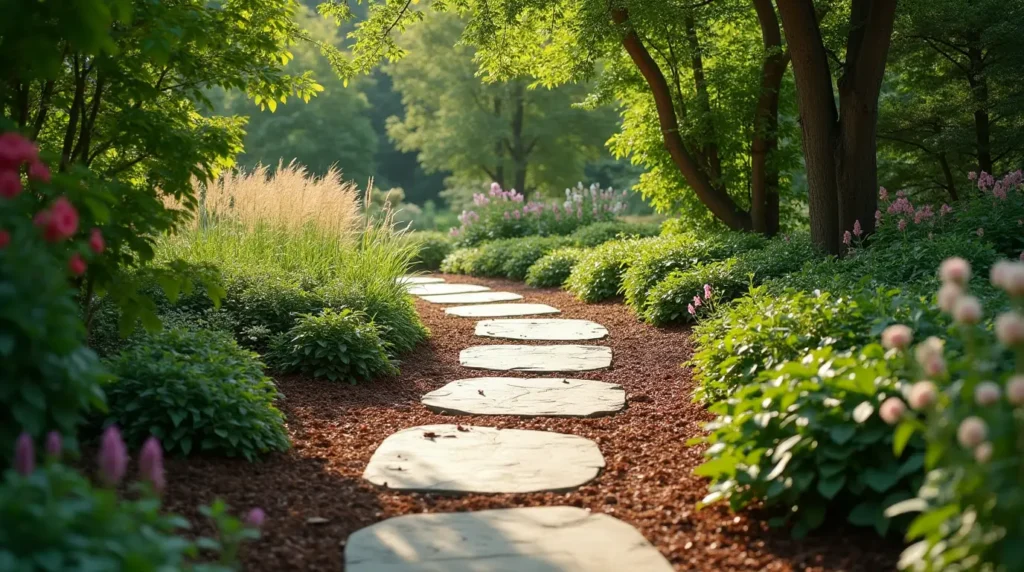
Embrace Natural Pathways with Mulch and Stone
Creating inviting pathways through your garden is a fantastic way to guide visitors while adding both functionality and charm to your outdoor space. Natural materials like mulch and stone not only provide a rustic look but also promote drainage and minimize weed growth. In this section, you’ll learn how to select the right materials and design pathways that enhance the beauty of your landscape.
Choosing the Right Materials
When it comes to pathway materials, the options are diverse. Here are a couple of popular choices:
Consider your garden’s overall aesthetic when choosing materials. For a rustic look, opt for wood mulch and natural stone; if you seek a polished finish, decorative gravel or flagstone might be the perfect fit.
Designing Your Pathway
Once you’ve selected your materials, it’s time to think about the layout. Here are some easy steps to consider:
- Plan Your Route: Walk through your garden and decide where you want pathways. Mark your proposed route with stakes and string to visualize the space.
- Consider Functionality: Ensure that the chosen pathways allow easy access to your garden areas, such as flower beds or vegetable patches. Width is also important—typically, 2-3 feet wide works well for foot traffic.
- Edging the Pathway: Define the edges of your path using bricks, wooden borders, or low plants. This helps prevent the materials from spilling out into the garden and keeps your pathways looking neat.
Installing the Pathway
Using edging materials like the one above can tie your pathway together while also protecting it from overgrowth.
Maintenance Tips
Regular upkeep is essential for keeping your pathways in pristine condition. Check periodically for any accumulation of debris or weeds that may have made their way into your paths. Reseed or replenish mulch as necessary to maintain a fresh appearance.
By embracing natural pathways made of mulch and stone, you’ll not only enhance the functionality of your garden but also create inviting trails that beckon exploration. As you wander along these charming routes, consider how you might elevate your outdoor experience even further by adding serene water features. Let’s dive into that next!
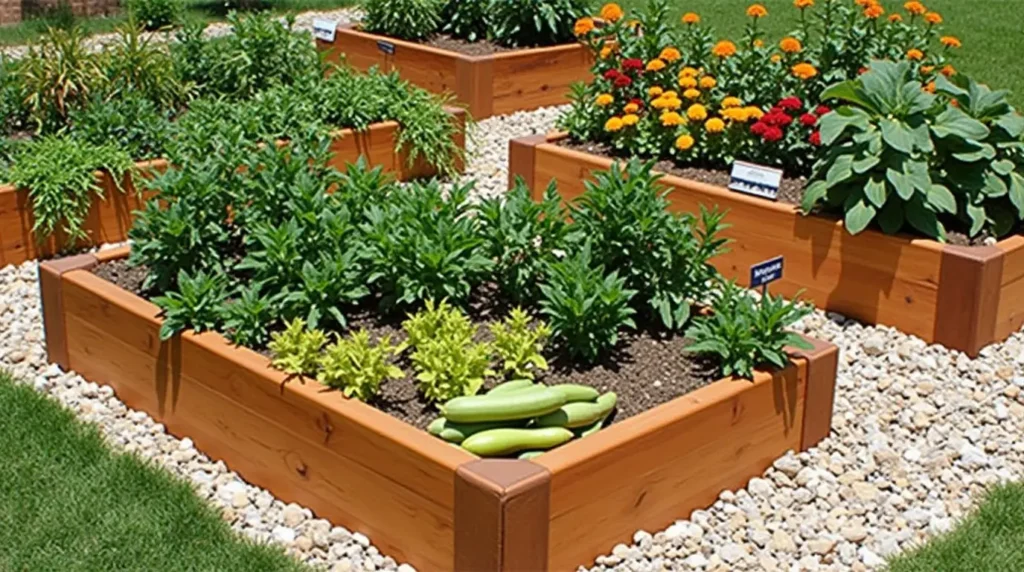
Incorporate Raised Garden Beds for Ease and Beauty
Raised garden beds are a brilliant addition to any outdoor space, combining functionality with aesthetic charm. They not only elevate your planting area, making gardening much easier on your back, but they also create a visually appealing landscape. Here’s everything you need to know to build and arrange raised beds, whether you’re growing vibrant flowers or delicious vegetables.
Building Your Raised Garden Beds
Creating your raised garden bed is simpler than you might think. Here’s a step-by-step guide:
- Select Your Location: Choose a sunny spot in your yard, ensuring your plants will get the right amount of sunlight. Ideally, you should aim for at least 6-8 hours of direct sun each day.
- Choose Your Materials: Common materials for raised beds include:
- Wood (cedar is often recommended for its durability)
- Metal (such as galvanized steel)
- Bricks or concrete blocks
- Determine Size and Depth: A good size for a raised bed is roughly 4 feet wide and between 4-6 feet long. Ensure the depth is at least 12-18 inches, allowing roots enough space to grow.
- Build the Frames: Assemble your frames using corners and screws for wooden beds or stacking your chosen materials. Ensure they’re level and secure.
- Fill with Soil: Fill your beds with a mix of high-quality garden soil and compost. This blend provides plants with the nutrients they need to thrive.
Arranging Your Plants
Once your raised beds are constructed, think carefully about what to plant and how to arrange them for maximum beauty and productivity:
Soil Management Tips
Proper soil management is crucial for the success of your raised beds. Here are some tips to keep your soil healthy:
Raised garden beds are not just practical; they also create an inviting and organized look in your landscape. They can serve as focal points, offering a splash of color and life throughout your outdoor space. As you admire your flourishing plants, think about next enhancing your oasis with calming water features that bring tranquility and refreshment to your oasis.
Add Water Features for Serenity
Water features can greatly enhance the tranquility of your garden, inviting not only human admiration but also the sweet melodies of wildlife. Imagine the gentle sound of water cascading from a small fountain or the mesmerizing ripples on the surface of a pond, adding a soothing ambiance to your outdoor oasis. Below are some simple DIY water feature ideas you can implement easily without needing professional skills.

DIY Fountain Ideas
Building a fountain can be straightforward and immensely rewarding. Here are two popular options:

Using a solar-powered pump can simplify installation and operation, saving on electricity while embracing eco-friendly aesthetics.
Creating a DIY Pond
If you have a bit more space, consider adding a small pond to your backyard. Here’s how to create one step by step:
- Select the Spot: Look for a flat area with partial shade to prevent excessive algae growth while allowing sunlight for observing the pond’s surface.
- Outline the Shape: Use a hose or rope to outline the shape you want for your pond. Consider including a shallow area where you can plant water lilies or other aquatic plants.
- Dig and Line: After deciding on the dimensions, start digging! Ensure the pond is at least 2 feet deep in the center. Once the hole is complete, you can line it with a pond liner, securing the edges with rocks or soil.
- Add Water and Plants: Fill your pond with water and introduce aquatic plants. Water lilies, fish, and floating plants will add beauty and help create a balanced ecosystem.
- Incorporate Decor: Adding decorations such as stones, driftwood, or even small sculptures can personalize your pond and create focal points within your garden.
Attracting Wildlife
Water features do wonders for attracting wildlife such as birds, butterflies, and beneficial insects. To enhance this effect, consider adding:
Creating DIY water features in your garden not only provides a serene space but also supports local wildlife, making your garden a sanctuary of peace. After adding these calming elements, you can continue to bring your outdoor space to life with colorful planters and decor that truly reflect your personality and style. Let’s sprinkle some color into your landscape next!
Use Colorful Planters and Outdoor Decor
Your outdoor oasis doesn’t truly come to life until you add the vibrant touches that speak to your personal style. Colorful planters and eye-catching decor can transform any space, enhancing its visual appeal and inviting you to step outside and enjoy your surroundings. Let’s explore creative ideas for using pots and decorations to infuse personality into your garden.

Choosing the Right Planters
When selecting planters, consider both functionality and artistry. Here are a few options that can instantly elevate your outdoor aesthetic:
Consider using planters of varying heights and shapes to create visual interest. For instance, you can group taller pots with trailing plants alongside shorter, round containers. Mixing materials and finishes encourages a playful vibe in your garden.

This gorgeous teal planter can serve as a stunning focal point, complementing a sunny corner with colorful flowers or herbs.
Adding Decorative Objects
Don’t stop at planters; outdoor decor can truly bring your garden to life. Here are some ideas to consider:
Incorporating Art and Texture
Think beyond traditional decor by incorporating art pieces to enrich your outdoor experience. Here are two impactful ideas:
When you use colorful planters and charming outdoor decor, you’re creating more than just a garden; you’re constructing an enjoyable outdoor experience that resonates with your personality. From the bright blooms nestled in eye-catching pots to the enchanting ambiance set by thoughtful decor, your garden becomes a personal retreat inviting exploration and serenity.
As you revamp your outdoor space, remember that the journey has just begun. With these vibrant enhancements in place, your outdoor oasis is ready to welcome even more enchanting elements. Let’s look at how to pull everything together beautifully in the conclusion!
Your Outdoor Oasis Awaits
With these five simple DIY landscaping hacks, you’re now equipped to transform your outdoor space into a lush and lovely oasis. Each idea is designed to inspire creativity while enhancing the beauty of your environment. From vibrant vertical gardens to serene water features, embracing these hacks will not only elevate your landscape but also provide you with a personal sanctuary to enjoy.
Remember, this journey is yours. Take your time, experiment with different plants and decor, and let your outdoor space reflect your unique style. Your dream garden is within reach—start today, and watch your outdoor oasis flourish!
Frequently Asked Questions
What are some budget-friendly landscaping ideas mentioned in the article?
The article covers five main DIY landscaping hacks, including creating a vertical garden, using natural pathways with mulch and stone, incorporating raised garden beds, adding water features, and using colorful planters and outdoor decor.
How do I create a vibrant vertical garden?
To create a vertical garden, choose the right location that gets adequate sunlight, select appropriate plants that thrive in that environment, and utilize creative structures like trellises or wall-mounted planters to support your plants.
What materials are recommended for creating natural pathways?
You can choose from a variety of materials such as mulch, gravel, stones, or pavers for creating your pathways. The article provides tips on how to select the right materials based on your garden’s aesthetic and functionality.
What are the steps to build raised garden beds?
Building raised garden beds involves selecting the right materials like untreated wood or bricks, arranging the beds in a convenient layout, and ensuring good soil management for optimal plant growth.
How can I incorporate water features into my landscaping?
The article suggests DIY projects, such as creating a fountain or a pond. It provides ideas and considerations for designing these features to enhance the tranquility of your garden and attract wildlife.
What types of plants are suitable for a vertical garden?
You can select a variety of plants depending on your climate and sunlight conditions, including herbs, succulents, flowering plants, and trailing vines. The article advises choosing plants that complement each other in terms of growth habits and maintenance needs.
What tips does the article provide for maintaining your garden?
The article includes maintenance tips such as regular watering, soil management, pruning dead leaves or flowers, and ensuring that your plants have adequate sunlight and nutrients.
How can I make my outdoor decor more visually appealing?
Using colorful planters, adding decorative objects, and incorporating art and textures into your garden design can significantly enhance its visual appeal. The article discusses these elements to help you create a cohesive and beautiful outdoor space.
Can these landscaping ideas work in small spaces?
Yes! Many of the DIY hacks mentioned are perfect for small spaces. Vertical gardens, raised beds, and decorative planters can be adapted to fit limited areas while still providing a vibrant and lush outdoor environment.
Where can I find more information or guides on DIY landscaping?
For more detailed information, tips, and step-by-step guides, refer to the full article, which offers comprehensive insights into each landscaping hack mentioned.
The idea of natural pathways sounds amazing but also a bit overwhelming. Are there any guides out there?
Sure Lucas! We recommend starting with a simple layout and gradually expanding. Check out local gardening forums for community advice!
YouTube has some great tutorials too on creating pathways. It can be easier than it looks!
Wow, I never realized how much a few simple hacks could transform a garden. I might consider making my own raised garden beds. Do you think the galvanised ones work better than wooden ones?
Both materials have their pros and cons! Galvanized are sturdier and last longer, but wooden ones can be more aesthetic.
I prefer wooden for aesthetics too, but galvanized are awesome for veggies since they resist rot!
This is great! I’m planning to do a DIY outdoor dinner setup, so the vibrant colors really inspire me! Do the planters hold up in rain?
I have a few from the list, and they handle rain like champs. No worries!
Absolutely! Most outdoor planters are weather-resistant, just check the product specs when selecting.
Cool ideas but where do I even start? 😅 I love the thought of a water feature, but can it be too much? My backyard’s tiny. Any suggestions?
Yeah, Nina! A small pond or a fountain could add elegance without overwhelming the space. Look for a compact one!
Nina, you can start small with a simple fountain! They don’t take up much space but add a lot of charm. 😊
Not sure if I dig the water feature idea. Seems like high maintenance! ⛲️ Are there low-maintenance options for someone just starting out?
Definitely! Look for small solar fountains—they’re easier to manage!
I second that! Plus, they’re eco-friendly and don’t require complicated plumbing!
Just ordered those reusable Velcro ties! Can’t wait to see how they help with my climbing plants. 😍 Do they really last long?
They’re pretty durable, Tina! Plus, you can adjust them as your plants grow.
I use them all the time! They’re fantastic for keeping everything in place, very sturdy!
Absolutely love these ideas! I need to try that vertical garden hack—my walls are just so bare. 🙈 Also, those solar turtle lights sound adorable! 🐢✨ I can just imagine them lighting up my backyard at night. Anyone else thought about using the colorful planters? I wonder if they’d match with my flowers?
Hey Jess, I got the HC Companies teal planter and it looks awesome in my garden! Definitely worth it!
Thanks for your feedback, Jessica! The vertical garden is a game-changer for small spaces! 🌿 And the colorful planters really do brighten up any garden setting.
I’m not super handy, but the mulch pathway sounds like something I could manage. What kind of mulch do you recommend? 🤔 And does it really help with weeds?
Great question, Samuel! Organic mulch can help a lot with weeds and it eventually enriches the soil. Bark mulch or wood chips work well!
I use cedar mulch, Samuel. Keeps the weeds down and smells great too!
Hey, I hate weeding! 😂 If these hacks help me spend less time in the dirt, I’m sold! Especially interested in the raised beds. How deep should they be?
I did 18 inches for root veggies like carrots. The deeper, the better for some plants!
For vegetables, 12 inches is usually great! It gives plants enough room to grow.
Lol, love the turtle statue! 😂 Thinking it’ll be a great addition for my kids’ play area. Anyone have experience with that?
It’s adorable! Just make sure to place it where it gets sun for the lights to work!
The solar turtle statue is a hit with kids! It adds a fun vibe to any garden.